Mar 31, 2010

Polish Bloggers Network: Lacquer Link Love 3/26/10

.


Tuli shows us some super sweet and very pretty manicure ideas in honour of the Passover holiday.


Konadomania gives us some animal magic with a ggggggreat OPI Dim Sum Plum konadicure.


Check out Naive Nails modeling an all time classic China Glaze - such a QT!


Brooke traveled from Hong Kong to Japan for her latest manicure! Check out her Konad design with OPI Red My Fortune Cookie and KOH Black Stars.


Warning – if you click here, you will create a new lemming with this amazing mermaid shimmer shown by Perfect10 Beauty. She also brings news on a bargain matte topcoat.


Evil Angel does Cute! Check here to see her brilliant Cute As Hell Konad extravaganza!


The Swatchaholic keeps us craving softer shades with some amazing shots of Illamasqua's new pastel collection.


Cucumpear shows off some striking nail art with a cool mix of gloss on matte.


Head on over to Polish on Digital Paper to remember your childhood with the cutest Care Bear themed nail art.


Moncoinamoua gets her hands on the ones everyone’s been waiting for. Click here to see her amazing swatches of OPI’s new Shrek collection, and be prepared to fall accidentally in love with them.


You’re the one that I want! Helen shows off her Pink Lady credentials with a fab fuschia from Models Own.


Sasha shows off her BFF Best Boyfriend over at Manicure Mommas.

Mar 28, 2010

לקים צבעוניים לחג !

.


ההכנות לחג בעיצומן והזמן אוזל, אז היום אני אראה לכן את הסווטצ'ים על גלגלי ציפורניים – מקובל עליכן, נכון ? J

אז קודם כל, הבטחתי שאני אראה לכן כמה לקים צבעוניים וחגיגיים לחג והבטחות צריך לקיים !

היה לי ממש קשה לבחור הפעם, כי באמת יש כל כך הרבה יפים, אבל בסופו של דבר בחרתי כמה שהם גם מיוחדים בעיניי וגם מתאימים לאווירת חג. בנוסף, בחרתי לקים שאמנם לא השגתי בארץ, חוץ מאחד, אבל את כולם (חוץ מהסאלי הנסן, שלגביו אני לא סגורה) אפשר להזמין לארץ מטראנסדיזיין או מאתרים אחרים.

בנוסף, אני מראה לכן כמה דוגמאות לפרנץ' מניקור עם נקודות פולקה שעשיתי על גלגל הציפורניים – כבר הבנתן שבא לי על פרנץ' בחג הזה, לא ? חחחח

עשיתי את זה ביד חופשית, כך שזה לא הכי מדוייק, אבל זה בעיקר כדי שתוכלו לקבל רעיונות לשילובי צבעים J

מקווה שתהנו ו......מחר אני אציג בפניכן את המניקור שלי לחג !


שמות הלקים מפורטים מתחת לתמונה:


L to R:

China Glaze Raspberry Festival
China Glaze Ruby Pumps
China Glaze Emerald Sparkle
Sally Hansen Celeb City
Color Club Tru Passion
OPI Holiday Glow
OPI DS Amethyst
Le Chat Disco Flares


I'm in the middle of preparations for the holiday and time is running out, so today I'll show you the swatches on the nails wheels, if it's o.k. with you J

So first, I promised to show you some colorful and festive polishes for the holiday and promises should be kept !

It was very hard for me to choose, because there are really so many stunning polishes, but eventually I chose some which are special in my eyes and also fit the holiday spirit.

Also, I show you today some examples of french manicures with polka dots I did on the wheel – I guess you've already got it that I want a french mani for this holiday …lol

I did those manicures freehand, so it's not very accurate, but I did it mainly for you to get ideas for colors combinations J

I hope you enjoy it and…….tomorrow I'll show you my mani for the holiday !

Mar 27, 2010

Red for the holiday !

.


אי אפשר גם בלי אדום, נכון ? J

אז הנה עוד רעיונות לציפורניים שלכן לחג !

העיצוב הראשון הוא פרחוני ואביבי – הוא מקורי יותר ומרענן והקטע שלצערי לא הצלחתי להעביר בתמונות כמו שרציתי – הוא ממש כיפי ! כן, לא יכולה להסביר, ובטח אני אשמע לכן קצת מטורללת, אבל הוא הרגיש ממש "קליל" וכיפי על היד J

עשיתי פרנץ' רגיל בעזרת המדבקות והלק הלבן של אורלי מערכת הפרנץ' וכשזה התיייבש, הוספתי לו פרחים בעזרת ערכת החותמות של קונאד. השתמשתי בפלטה M3, בלק הלבן של קונאד לפרחים הלבנים וב – Malaga Wine של OPI לפרחים האדומים ( צבע מדהים בפני עצמו !).

גם הפעם בחרתי להראות לכן משהו אחר בקמיצה, באותו סגנון, ואפשר לעשות אותו על כל האצבעות או רק על אצבע אחת, לבחירתכן. על הקמיצה מרחתי את הלק הלבן של אורלי כבסיס ועליו החתמתי את הפרחים כמו בשאר האצבעות. אח"כ הוספתי גם כמה בלינגים ירוקים להשלמת המראה האביבי הטרי.

מעל הכל השתמשתי רק במייבש שקוף, אבל שימו לב – בשתי האצבעות הראשונות ההחתמה עוד לא היתה יבשה לגמרי ואתן יכולות לראות שהיא קצת נהרסה. חיכיתי עוד כמה דקות ורק אז המשכתי על שתי האצבעות האחרות ואתן יכולות שזה נראה הרבה יותר טוב, אז שימו לב לזה כשאתן עושות דוגמאות מהסוג הזה, כי יהיה חבל להתחיל את הכל מהתחלה J


ואי אפשר בלי לק אדום קלאסי, נכון ? אני מניחה שתראו הרבה ציפורניים אדומות בליל הסדר, אבל לא אצלי כנראה....מה שכן, רציתי להראות לכן אופציה מעניינת יותר ללק האדום הרגיל והוספתי לו לבבות. לדוגמא הזאת הוספתי בכל האצבעות אבל כמובן שאפשר להוסיף רק באצבע אחת אם רוצים את המראה הנקי יותר וכמובן שזה יכול להיות כל דבר אחר ולאו דווקא לבבות – פרחים, כוכבים וכו'.

הלק האדום שהשתמשתי בו הוא Essie Queen of Hearts מקולקציית היהלומים המצומצמת של Essie– אדום מקסים במרקם קרמי (אפשר להגיד אדום בהיר ? אם כן, אז זה מה שהוא...חחח) בבקבוק ממש אפשר לראות את אבקת היהלומים, למרות שעל הציפורניים לא הצלחתי להבחין בזה. המריחה שלו מעולה ושתי שכבות מספיקות בהחלט !

להחתמה השתמשתי בפלטה M3 של קונאד ובלק הלבן של קונאד.

מכיוון שמיהרתי לצלם, לא הוספתי טופקואוט הפעם אבל אני יכולה להגיד לכן שעם הטופקואוט זה נראה אפילו עוד יותר טוב.

הערה קטנה ממני – לדעתי הלק הזה והעיצוב הזה היו נראים הרבה יותר טוב על ציפורניים טיפה יותר קצרות. לאו דווקא קצרות בהרבה, אבל יותר קצרות מהאורך הזה, זאת בכל אופן היתה ההרגשה שלי. השארתי את הציפורניים שלי באורך הזה לחג, כי הפרנץ' נראה ממש טוב עליהן באורך הזה ומאוד מתחשק לי פרנץ' לחג, אבל רציתי להראות לכן גם את הדוגמא הזאת J


You can't go without some red, right ? J

So here are more ideas for your nails for the holiday !


The first manicure is springy and flowered - it's fresh and really fun. Yap, I can't explain it, and I probably sound a bit crazy, but it felt so "light" and fun on my nails J

I did the usual french mani with the white polish from Orly French manicure kit and then I added some flowers with Konad. For the white flowers, I used Orly white polish and for the red flowers, I used OPI Malaga Wine (an amazing color on its own !)

This time also, I chose to show you something different on the ring finger, in the same style, and you can do it on all nails or just on one, as you want. On the ring I use Orly white polish as a base and than added the red flowers like I did on the other fingers. Then I added some green blings, to complete the fresh springy look.

Above all I used only clear topcoat this time – you can see in the first two fingers that the stamping was a bit ruined because I didn't wait long enough before I applied the topcoat. I then waited a few more minutes and applied the topcoat on the other two nails and you can see it looks much better, so pay attention to that when you do manicures like that, you won't want to start it all over….:-)

And how can you do without a classic red ? I guess you're going to see lots of red nails in this holiday, but not on me….I did want to show you a more interesting mani for the usual red polish and I added hearts to it. For this mani, I added the hearts on all my nails, but if you want a cleaner look, you can add it just on one nail.

I used Essie Queen of Hearts from Essie Loves Diamonds collection– gorgeous red polish in a crème texture (can you say a light red ? if so, that what it is…lol) in the bottle you can actually see the diamond dust, but I didn't see it on the nails. Its application is superb and 2 coats will do the work !

I used Konad M3 plate and Konad special white polish for stamping.

I was in a rush to take the pictures so I didn't add topcoat, but I can tell you it looks even better with topcoat.

Small note from me – I think this polish and this design would look much better on shorter nails, not much shorter, but a bit shorter than this. I wanted to leave my nails in this length for the holiday, because the french mani looks really good on them in this length and I'd like to do a french mani for the holiday. I just wanted to show you this mani too J


Mar 25, 2010

More manicures for Passover !

.


הנה עוד שני רעיונות למניקור לחג –

לפני שאני מתחילה אני רוצה רק להבהיר שכל העיצובים עם הפרנץ' מניקור פשוט לא מצטלמים משהו. ניסיתי המון וזה פשוט לא יוצא. כולם נראים הרבה הרבה יותר טוב במציאות, בהתחייבות, אז קחו את זה בחשבון J

המניקור הראשון הוא עליז ושמח – בשביל הפרנץ' הורוד השתמשתי ה- Funny Face של Essie שהוא אחד הורודים המתוקים לדעתי, בסגנון ורוד ברבי, לכיוון הפוקסיה. נמרח מצויין ומעולה לפרנץ' – שכבה אחת דקה וזה מספיק לפרנץ' אטום !

לנקודות השתמשתי בלק הלבן לפרנץ' של אורלי (כל לק לבן אטום יעשה את העבודה) ובמנקד, שבעזרתו עשיתי את הנקודות – למי שלא מכירה, צירפתי תמונה של מנקדים – אני משתמשת בהם גם לנקודות וגם בשביל להדביק אבנים.

מעל הכל מרחתי את Mademoiselle של Essie – ורוד חלבי עדין מאוד, מתאים לפרנץ', אם כי הייתי מעדיפה אחד טיפ טיפה פחות חלבי. הלק הזה חיבר את כל הצבעים והפך אותם לקצת יותר חלביים ועדינים. אם אתן רוצות שהניגוד במניקור יבלוט יותר, עדיף להשתמש בלק שקוף.

את הקמיצה עשיתי בצבעים הפוכים, כדי שתוכלו להתרשם מהמראה ההפוך ולהחליט בעצמכן מה אתן מעדיפות, למרות שגם ככה זה מדליק J


המניקור השני הוא קלאסי יותר – השתמשתי בפלטת חותמות B56 של פרנצ'ים שקניתי בוואו. הדוגמאות בפלטה מקסימות ויוצאות מצויין, רק לקח לי זמן להתאמן על להניח אותן בצורה ישרה על הציפורן ועדיין יש על מה להתאמן....אבל האימון לגמרי שווה את המאמץ כי יוצא פרנץ' מדהים ומיוחד שנראה ממש מקצועי ומדוייק.

לפרנץ' השתמשתי בלק הלבן של קונאד ומעל הכל מרחתי את Mod Hatter של OPI שהוא אחד החביבים עליי – קשה לי לתאר אותו כי בבקבוק הוא נראה מעין מוקה ורדרד בהיר מאוד ושימרי, אבל על הציפורניים הוא נראה כמעט שקוף לגמרי, מאוד מאוד טבעי ועם ברק עדין. מתאים מאוד למי שרוצה לק "בלתי נראה" אבל שמקנה מראה של ציפורניים מטופחות.

הוא עידן את הפרנץ' ונתן לו מראה מאוד טבעי, יותר לכיוון החום (הטבעי) ופחות לכיוון הורוד, אם אתן מבינות למה אני מתכוונת...


Here are two more ideas for manicure for the holiday.

Before I start, I want to let you know that all the designs with the french manicure just don't turn out so good in the pictures, they all look much much better in reality, so take it into consideration.

The first mani is happy and cheerful – for the pink tips I used Essie Funny Face which is one of the sweetest pinks for my opinion, Barbie style toward fuchsia. Great application and perfect for french – one thin coat and you got an opaque french tips !

For the dots I used Orly white polish from the French kit (any opaque white will do the job) and a dotter – I use the dotter to make dots and to pick rhinestones and if you don't know this tool, I added a picture of my dotters.

Above all I applied Essie Mademoiselle – very delicate milky pink, good for French, although I'd rather it to be just a bit less milky. This polish connected all the colors and made them a bit more delicate. If you want more contrast, use a clear polish.

I made the ring finger with the opposites colors so you can decide what way you like best, even though I think it looks cool this way too J


The second manicure is more of a classic – I used a stamping plate B56 I bought here at "Wow Cosmetics". The images in this plate are beautiful and they turn out great, it just took me some time to practice on how to place the image straight on my nails, and I still need to practice….but it's totally worth it because you get an awesome and special french mani.

For the tips I used Konad special white polish and above all I used OPI Mod Hatter which is one of my favorites – it's hard for me to describe it because in the bottle it looks kind of shimmery pinkish mocha, but on the nails it looks almost clear, very natural with light shimmer.

It gave this mani a very delicate look, more toward the brown (natural) than the pink, if you know what I mean…..


Mar 22, 2010

Nails for Passover !

.


בתור התחלה, אני רוצה להתנצל על ההיעדרות הקטנה שלי בשבוע האחרון, גם מכאן וגם מהבלוגים שלכן – סתם מצב רוח עגמומי משהו שנפל עליי.....

אבל אתמול התחיל שבוע חדש והוא התחיל בנימה חיובית הרבה יותר ועם חג שהולך ומתקרב אלינו בצעדי ענק – לא יאומן שהוא כבר מגיע, אבל....פסח בפתח !

אז נקיונות כבר התחלתי, ומתכונים כבר התחלתי להוציא אבל מניקור עדיין לא בחרתי !

אני יודעת שגם אתן מתלבטות איזה מניקור לשים – זה שיגרוף המון מחמאות, זה שיפנה את תשומת הלב לציפורניים שהפסקתן לכסוס וזה שיתן לכן את ההרגשה הכי חגיגית בלב J

ובנוסף אני יודעת (כי הרי בתוך עמי אני חיה) שהרבה מכן מחפשות משהו עדין....אז החלטתי הפעם לבוא לקראתכן !

וזה הולך ככה – למי מכן שרוצה רק ורוד עדין או משהו כזה, יש כמה סווטצ'ים שעשיתי בעבר ואתן מוזמנות לחפש (לא תמצאו הרבה...חחחח) אבל באופן אישי נראה לי משעמם מדי לעשות על זה פוסט, יש המון פוסטים ברחבי הבלוגים עם מליוני גוונים של ורוד עדין ואתן תוכלו למצוא בקלות.

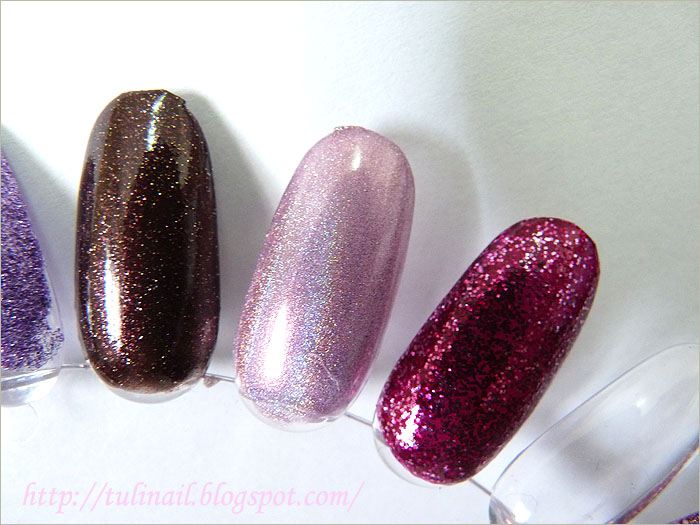
למי שרוצה רק לק צבעוני, עם נצנצים או בלי, דרמטי יותר או פחות – יש לי כאן המון סווטצ'ים שכבר עשיתי ואתן יכולות להיעזר בתגיות לחיפוש. מה שכן, אני כן אעשה השבוע פוסט עם לקים שאני חושבת שהם חגיגיים במיוחד לחג (לכל הנועזות שביניכן – אני יודעת שאתן כאן...חחחח).

מה שאני כן אעשה – זה להראות לכן כמה דוגמאות, רובן עדינות יחסית, אבל עם טוויסט שנותן להן משהו מיוחד וחגיגי יותר והכי חשוב – כולן מאוד פשוטות לעשייה ! כך שאתן תוכלו לקבל רעיונות למניקור שלכן לחג J

אני כבר אומר מראש, לאלו מכן שהן נועזות יותר, קחו בחשבון לגבי כל הדוגמאות – כולן ניתנות לביצוע גם עם לקים נועזים יותר, אז אם אתן רוצות מראה דרמטי יותר, אל תהססו להשתמש בצבעים כהים, שימריים או נצנצים, שילובי צבעים ומרקמים. אם אתן מחליטות לשנות את הצבע של הפרנץ' או החותמות, למשל, אל תשכחו להשתמש בלק אטום שיעשה לכן את העבודה !

אז הנה מתחילים:

זה הפרנץ' הקלאסי, שהוספתי לו מדבקות, פרח אחד לכל אצבע – כמובן שאפשר להוסיף איזו מדבקה שבא לכן וזאת ממש לא חייבת להיות הדוגמא הזאת בהכרח. אפשר להניח את המדבקה בצד של הציפורן, באמצע של קו בפרנץ או בחלק התחתון של הציפורן, זה בלי הפרנץ', איך שבא לכן. אפשר כמובן, להשתמש במדבקות רק לאצבע אחת למראה עדין יותר, לשתיים למראה מיוחד יותר, או לכולן (בתמונה הראיתי לכן מדבקות בכל הציפורניים כדי שתוכלו להתרשם, אבל הרבה פעמים אני אוהבת לשים רק בקמיצה).

מבחינת הפרנץ' עצמו – אני משתמשת במדבקות לפרנץ' שעוזרות לי לעשות את הפסים. אפשר למצוא את המדבקות האלו בחנויות כמו וואו, ביוטי קר וכו' בעלות של שקלים בודדים.

כדי לעשות פרנץ' מוצלח עם המדבקות, צריך קודם כל למקם אותן טוב על הציפורן ואז להצמיד היטב את המדבקה לציפורן, במיוחד בצדדים, כדי שלא תהיה "נזילה". השלב הבא הוא למצוא לק אטום יחסית שאיתו נעשה את הקו של הפרנץ', כי החוכמה היא ליצור שכבה כמה שיותר דקה של לק לקבלת מראה מדוייק. ככל שהשכבה של הלק תהיה עבה יותר, כך הסיכוי לקבל פרנץ' מדויק יקטן.

סדר הפעולות – אני שמה שכבת בסיס שקופה (אתן יכולות להשתמש גם במחזק, רידג' פילר וכו'), מחכה לייבוש מלא ואז שמה את המדבקות. אני מוציאה קצת את הדבק של המדבקות לפני (מדביקה אותן על השולחן או על החולצה ומורידה כמה פעמים) כדי שהדבק החזק לא יהרוס לי את שכבת הבסיס.

אח"כ אני עושה את הקו של הפרנץ' ונותנת לו להתייבש טוב, כדי שהוא לא ייהרס כשאני אסיר את המדבקה.

כשהפרנץ' מוכן, אני מורחת מעל את השכבה של הלק הורוד הבהיר (במקרה הזה די אכלתי אותה עם הלק וזה לא יצא כמו שתכננתי).

אם אני רוצה להוסיף מדבקות, אני מחכה שזה יתייבש ואז מוסיפה את המדבקות.

ומעל הכל אני מורחת שכבה של מייבש או מחזק, מה שבא לי.

לפרנץ' הזה השתמשתי בערכה של אורלי שנקראת The Original French Manicure ואני אספר לכן עליה בפוסט נפרד, אני רק יכולה להגיד שהלק הלבן בה היה מעולה, אבל הלק שאמור להיות הצבע הטבעי נמרח בצורה מזעזעת ונאלצתי לעשות מחדש אצבע אחת. במקומו, השתמשתי ב- Luscious Lips של Essie – זאת פעם ראשונה שאני מנסה אותו לפרנץ' ומבחינת צבע הוא נחמד, אבל היה לי טיפה ורדרד מדי. מבחינת המריחה, הוא לא נמרח אחיד בשכבה ראשונה ואתן יכולות לראות את זה בתמונה. במציאות זה היה נראה הרבה יותר טוב, כי לא היה עליו כזה קלוז אפ, מן הסתם, אבל עדיין....אני צריכה למצוא את הלק המושלם לפרנץ שיתאים לי....

מה אתן אומרות ? בא לכן לראות עוד דוגמאות ?

צירפתי לכן גם את המניקור "מצה" שעשיתי לפסח בשנה שעברה ואתן יכולות לקרוא עליו כאן.


As a start, I want to apologize on my disappearing last week, from here and from your blogs – I had a lousy mood…..

But today is a new week and it started much better J

We are having a big holiday here next week – Passover, so I've decided to show you this week some manicures you can do for the holiday. Most of the designs I'll show you this week are delicate, but you can easily turn them to be "bold" with different colors and textures .Just remember, if you change the colors of the french tips or the stamping, use an opaque color to get the best result.

This is the classic french manicure, with some flowers stickers I added – of course you can add any stickers you like. You can also use a sticker just on one nail to get a more delicate look.

I use french manicure white tip guides to do the French mani – for a successful mani, you should place the guides well on your nails and than press them to your nails especially in the sides, so there won't be any "lick". Next you have to choose an opaque polish for the tips – you need a polish that is opaque already after one coat, because you'll want to create a thin coat in order to get precise look.


For this french, I used The Original French Manicure by Orly – the white polish was great and did a good job, but the pink polish was awful and I had to take all of in one finger and do the french tip again. Instead of this one, I decided to use Essie Luscious Lips – it's the first time I try it for french mani and the color itself was nice, although a bit pinkish to me. The application wasn't the best and it didn't look smooth after one coat. You can clearly see it in the picture, although I can tell you that in reality it looked much better, because you don't see it in such a close up. but still, I have to find my perfect polish for French manicure.

What do you say ? Do you want to see more manicure ?

Oh, and I also added the "Matza" mani I did last year and you can read all about it in this post.


Mar 20, 2010

Polish Bloggers Network: Lacquer Link Love 3/19/10

.


Babbling Brook has her head in the clouds and to be quite honest, with all the sunshine around us right now I can't blame her. Check out her cute mani using OPI's Suzi Feng Shui... I promise it'll bring a smile to your face.


And after you too get your head out of the clouds... take a trip with Konadomania down by the sea!


Tuli has been having fun finger painting thanks to Nicole... LITERALLY, and wants to share with you this week her handpainted masterpieces. Pun intended!. :)


Naive Nails has lost her marbles and they've landed on her fingertips, lol.... check out the wonderful marbled mani they created while hanging out there.


Euridice brings you a really nice color comparison between OPI's Hot & Spicy and you guessed it, the Essence Hot & Spicy. See how they both stacked up.


The NEONs are coming, the NEONS are coming... and they're poolside with Pretty in Polish.


Cucumpear has a a little spring fever and a cute nail art tutorial to share with you that even the novices can follow.


Helen's Nice Things has a question about OPI's Dulce de Leche that only we fellow nail junkies can answer... or maybe not, lol!


And for all you green lovers out there prepare to foam at the mouth as new member Mon coin Moua brings you a sea of green spam swatches.


Now for some very special giveaways...


Bright Lights Big Color's "favorite things" giveaway ends today so make sure you've entered for your chance to win.


Polsh on Digital Paper is hosting a giveaway celebrating 125 followers... help her celebrate the ocassion by entering.


The Dutch Nail Blog is having a spring giveaway... be sure to check out her blog to see what you could win!


Did somebody say a 300 follower giveaway?!!! Yep, Konadomania is celebrating the big 3-0-0!


and Babbling Brooke is having a very special giveaway that you'll just have to click the link to find out about.


Mar 15, 2010

Some Finger Paints !

.


הנה עוד כמה מהלקים שקיבלתי בחבילה הנהדרת מניקול.

והפעם, שלושה לקים מהקולקציה האחרונה של Finger Paints. ראיתי את הקולקציה הזאת לראשונה בבלוג של סקרנג'י וממש אהבתי אותה, אז כשניקול שאלה אותי אם יש משהו מיוחד שאני ארצה בחבילה שלי, כתבתי לה שאני אשמח ללקים מהקולקציה הזאת – והיא היתה כזאת מקסימה ששלחה לי 3 מהם !

שלושתם ממש יפים, במרקם מיוחד – מעין שימר עם נצנצים, אבל במרקם חלק ולא במרקם ה"חתיכות" של נצנצים רגילים (וגם ההסרה כאן לא מהווה בעיה).

הפורמולה שלהם קצת נוזלית, אבל עדיין נוחה, השכבות הן דקות וזמן הייבוש שלהם סביר.

את השמות ושאר הפרטים אתו יכולות למצוא הפעם מתחת לכל תמונה, אבל לפני שאני משאירה אתכן עם התמונות, אני רק אכתוב לכן לגבי השכבות:


הכסוף היה צריך 3 שכבות – הוא חצי שקוף בשכבה ראשונה, וגם אחרי 3 שכבות הוא לא הרגיש לי אטום לחלוטין, אבל כן אטום במידה מספקת – זה היופי של המרקם הזה.

הסגול היה צריך 2 שכבות – הפורמולה שלו היתה הכי חזקה, כבר בשכבה ראשונה הוא היה נראה טוב ושתי שכבות הספיקו כאן לגמרי.

הורוד נראה טוב אחרי 2 שכבות אבל אני שמתי שכבה שלישית. האמת שהוא היה נראה לי יותר סגול בבקבוק מאשר על היד - על היד הוא נראה לי יותר ורוד, עם סגלגלות מסויימת.

כל התמונות צולמו בלי טופקואוט.

שיהיה לכולכן המשך שבוע נעים !


Sparkling Snow – I love this name ! This is a beautiful shade of silver, one of those delicate silvers I like. It needed 3 coats to get the look you see in the picture.


Icy Iris – A gorgeous deep purple. This one is a stunner and here is more - it needed only 2 coats !


Decked With Dazzle – This one seemed to me like a pinkish purple in the bottle, but on my nails I can definitely say it looks more pink than purple. Beautiful color, goes great with that texture ! This is 3 coats.


Here are some more polishes I received in the wonderful package from sweet Nicole.


This time, 3 of Finger Paints's last collection. I first saw this collection on Scrangie's blog and I really loved it, so when Nicole asked me if there's something special I would like to get in my package, I wrote her that I would love to get polishes from this collection – and she is such a sweetheart sending me 3 of them !

They are all gorgeous and they have a special texture – kind of a flecked shimmer (I didn't really know how to define them, so if you do, please write me so I'll know). This texture is smooth and the removal is easy too.

The formula of all was a bit on the runny side, but still easy to apply, the layers are thin and the drying time is reasonable.

This time you can find all the other details below each picture. All the pictures were taken without topcoat.


Thank you Nicole !


I wish you all a wonderful week !


Mar 14, 2010

Please don't vote for me

.

אני יודעת שלפני כמה ימים ביקשתי מכן להצביע לי בתחרות באתר של רשת בלוגריות הלקים, אבל מכיוון שהחלטתי לפרוש מהתחרות, רציתי לעדכן אתכן בפרישה כדי שלא תטרחו לשווא - אז בבקשה, אל תצביעו לי יותר.

לכל אלו מביניכן שכבר הצביעו - תודה רבה רבה על התמיכה, אני מקווה שאתן יודעות עד כה אני מעריכה את זה ושולחת לכולכן חיבוק ענק !


I know that a couple of days ago, I asked you to vote for me in the China Glaze & Seche Vite contest which takes place in the Polish Bloggers Network website, and I wanted to give you a quick update:

I'm quitting the contest.

So please, don't vote for me anymore. If you still want to participate, you're very welcome - there are many gorgeous designs made by my fellow bloggers and I'm sure your votes would be very welcome.


To those of you who already voted for me - I want to thank you on your support and for the effort you did to show me your love - I hope you know how much I appreciate that and I send you all a big hug !


Kisses,

Tuli

Milani Totally Cool

.


היום אני מראה לכן עוד אחד מהלקים המקסימים שקיבלתי בחבילה מניקול.

והפעם - Totally Cool של מילאני – סגול די כהה עם המוןןןןן נצנצים ורודים קטנטנים. כשאני כותבת סגול די כהה, אני מתכוונת שהוא לא מאוד כהה כמו חלק מהסגולים שנוטים לשחור, אבל גם לא לגמרי מה שנקרא "סגול מדיום" – הכוונה היא שהוא נראה על היד כמו סגול כהה, פשוטו כמשמעו.

כשהסתכלתי על הלק הזה בבקבוק, יכולתי להישבע שאני רואה בו נצנצים בכל צבעי הקשת, אבל על היד הצלחתי משום מה להבחין רק בנצנצים ורודים, אז היה לי מאוד קשה להגדיר אותו הפעם במדויק.

בכל אופן, הוא ממש ממש יפה, עמוק, עשיר ומעניין, בדיוק כמו שאני אוהבת.


מבחינת מריחה, הוא טיפה נוזלי והוא חצי שקוף בשכבה ראשונה, אז אם אתן רוצות להגיע למראה שבתמונות, קחו בחשבון שצריך כאן 3 ואפילו 4 שכבות. מה שכן – שווה את המאמץ, כי הוא באמת נראה מעולה.


Milani - Totally Cool


Today I want to show you another one of the charming polishes Nicole has sent me.

This time – Totally Cool by Milani – a pretty dark purple loaded with tiny pink glitter. When I say pretty dark purple, I mean it's not very dark, like those purples who look almost like black, but not exactly what's called "medium purple" - I mean that it looks on the hand like a dark purple.

When I first saw it in the bottle, I could have swear I see rainbow colors glitter in it, but on my nails I managed to notice only pink ones, so it was hard for me to define you this one.

Anyway, this one is very very pretty, deep, rich and interesting, exactly how I like it.


The formula here is a bit on the runny side and it's sheer in the first coat, so if you want to get the look you see in the pictures, you'll need 3 and even 4 coats. But I can assure you that it worth the effort, because it looks stunning.


Mar 13, 2010

Polish Bloggers Network: Lacquer Link Love 3/12/10

.


Brooke took a tour of Hong Kong and has the polish swatches to prove it! Check out all the colors from OPI's newest collection and see which ones she loves the most at Babbling Brooke.


Tuli opened up a virtual polish market to facilitate polish swaps at Tuli's Nails! Check it out and sign up - someone may just be trading that polish you've been looking everywhere for.


Landa went totally holographic at Bright Lights, Big Color - and it only cost her $2!


Rija of Polishing the Nails has some Pistachio ice cream nails. Who would have thought a Laguna Lagoon would be so beautifully minty?


Check out how OPI's hottest new shade, Jade is the New Black, stacks up against a few other greens at Prim and Polished!


The Dutch Nail Blog swatched some scandalous polishes from Cheeky Monkey Cosmetics. Check out her great Konad and see just why these polishes are called 'Cheeky'!


Purple looks great with purple, especially on GildedAngel's nails! Pop over to Naive Nails to see her lovely Konad.


A taupe is a taupe is a taupe, right? Not so fast! Look at how a variety of taupes stack up against each other at The Swatchaholic. Which one is your favorite?


Are you loving Tim Burton's Alice in Wonderland? Check out Therese's great Alice in Wonderland mani at Nail Design, and learn how to do it yourself with her tutorial!


Nail'd and Polish'd has some gorgeous pops of spring color from Ulta's polish collection. What's your favorite shade?


Get a taste of OPI's delicious Hong Kong collection at Manicure Mommas, and check out how gorgeous they look matte!


Take a walk down glittery Canal Street with Helen at Just Nice Things.


Did you love the Oscars? Relive the glamour and excitement with Niki's awesome manicure, representing each movie on one nail. Wow!


How does Nars Purple Rain stack up against China Glaze Let's Groove? Check out My Guilty Pleasure's comparison, and decide if the $21 price tag is worth it for the Nars!


And now.....Giveaways!!!


Check out...


Rija is giving away 6 gorgeous glittery polishes in celebration of her birthday. Check it out before March 21!


Win two polishes from the OPI Hong Kong collection at Manicure Mommas! Enter before March 22!


European readers, enter to win some Konad and China Glaze to get you polishing this spring at The Dutch Nail Blog! Enter before March 21.


Enter to win a boatload of goodies, including OPI polishes from the Hong Kong collection at Bright Lights, Big Color! Enter before March 19!


Babbling Brooke has teamed up with Designer Blogs to give away a blog makeover. Enter to win before March 27!


Mar 11, 2010

Package from Kitty :-)

.


אנחנו אוהבות חבילות כאן, נכון ???

אז הנה עוד אחת !

את החבילה הזאת קיבלתי אתמול מקיטי המתוקה –http://kittyluvscolor.blogspot.com/


זאת החלפת החבילות השניה שלנו וקיטי שוב שיחקה אותה !

קיטי קראה באחד הפוסטים שכתבתי, כשכהייתי בטיול שלי לארה"ב, לא הספקתי לקנות את כל הלקים של סינפול שרציתי, אז היא פשוט הלכה וקנתה לי את כל הרשימה שהיתה ! נכון שהיא פשוט מדהימה ?

בחבילה שהיא שלחה לי מצאתי 9 לקים, כולם של סינפול, והם מדהימים ומיוחדים אחד אחד, פשוט מושלם !!!

אני כבר לא יכולה לחכות לנסות את כולם ובטוח אני לא אדע ממה להתחיל...חחח...אבל אני מבטיחה לכן סווטצ'ים שלהם בקרוב ! בינתיים, כתבתי את השמות של כולם מתחת לתמונה J


איזה כיף זה לקבל חבילות כאלה !!!


ואם גם לכן בא לעשות החלפה עם מישהי מחו"ל או מישראל, אתן מוזמנות להשתמש בשוק הלקים החדש שפתחתי - http://tulinail.blogspot.com/p/polish-market.html

אתן יכולות להחליף שם גם לקים שהשתמשתן בהם ולקבל תמורתם לקים אחרים ואתן יכולות גם ליזום החלפות של לקים חדשים, מה שתבחרו, וחבילות צבעוניות וכיפיות יהיו גם בדרך אליכן J


L to R:

I Miss You
Shausha
Kismet Elated
Forget Now
Dream On
Let's Talk
Daddys Girl
Nail Junkie
San Francisco


We love packages around here, don't we ???

So here is another one !

I received this package yesterday from sweet Kitty –http://kittyluvscolor.blogspot.com/


This is our second swap and Kitty nailed it again !

Kitty read in one of my posts, that I haven't managed to buy all the Sinful polishes I wanted in my trip to the USA, so she just went and bought me the whole list I had ! Isn't she just amazing ?

She sent me in this package 9 polishes, all Sinfuls, and they are all stunning and special, just perfect !!!

I can't wait to try them all and I'm sure I won't know where to start…lol…but I promise you some swatches soon ! Meanwhile, I wrote for you all their names below the picture J

Receiving packages like that is so fun !!!


And if you feel like doing a swap too, with somebody overseas or from your country, you're welcome to use the new polish market I've opened -

http://tulinail.blogspot.com/p/polish-market.html

You can exchange there used polishes you have in return to another polishes and you can initiate swaps with new polishes, as you like – and colorful packages would be on their way to you too J


Thank you so much Kitty for this wonderful package !!!

Mar 10, 2010

China Glaze & Seche Vite Contest !

.


היום נפתחה תחרות ה- China Glaze & SecheVite באתר של רשת בלוגריות הלקים, שאני חברה בה !


כל משתתפת היתה צריכה ליצור מניקור מיוחד לתחרות, הפעם ללא נושא מסוים, אבל הכלל היה שחייבים להשתמש בלקים של שתי החברות האלו בלבד.

כשקראתי לראשונה על התחרות הזאת ממש התרגשתי מהעובדה ששתי החברות האלו הסכימו לקחת חלק בפעילות הרשת שלנו ולהציע פרסים כאלה נהדרים, ועוד לשתי זוכות ! וחשבתי לעצמי שיהיה מאוד חבל לפספס הזדמנות כזאת.

את כל הפרטים על התחרות והפרסים אתן יכולות לקרוא באתר הרשת ובכלל, אני מזמינה אתכן לעקוב ולהצטרף לאתר של הרשת ולהתעדכן בכל החדשות החמות בתחום הלקים - http://nailblognetwork.onsugar.com/ !


טוב, אז לקים של צ'יינה גלייז יש לי הרבה ולקים צבעוניים של Seche אין לי (עדיין) אבל יש לי בהחלט את המוצרים הטיפוליים שלהם – בסיס, רידג' פילר ומייבש.

היה לי קשה מאודדדדד לבחור את הלקים, אבל החלטתי ללכת עם אחד הלקים שלהם שנקרא סטלה, שהוא אחד הסגולים האהובים עליי ביותר ובכלל, אחד מהלקים המועדפים שלי !!!

הלק הזה הוא כל כך יפה, כל כך עמוק וכל כך....סקסי...שהחלטתי ללכת עם התחושה הבסיסית שלי לגביו ולנסות ליצור מניקור "סקסי". ומה יותר סקסי ממחוך ?

טוב, יש עוד הרבה דברים....אבל זה הדבר היחיד שידעתי לצייר לבד....חחחחח

אז החלטתי על מחוכים ואבנים שישבו על סטלה ו.....התוצאה לפניכן ! ברוח המניקור, קראתי לעיצוב הזה "סטלה הסקסית" ואני מקווה שאתן תאהבו אותו J


כדי ליצור את הפסים של המחוך, השתמשתי בלק נוסף של צ'יינה גלייז, שנקרא How About A Tumble ובאבנים לצדדי המחוך. כדי ליצור את הלק הנוצץ, השתמשתי בסטלה כשכבת בסיס (2 שכבות) ומעליו מרחתי את Carnival Lights המדהים, כמובן גם של צ'יינה גלייז.

בנוסף, השתמשתי ברידג' פילר של Seche Vite כשכבת בסיס ובמייבש שלהם כטופקואוט.


בתחרות יש עוד הרבה בלוגריות נוספות שמשתתפות וכולן ביצעו עבודות נהדרות ועיצובים מקסימים, אז אני יודעת שיהיה קשה לכן לבחור אבל אני מאוד אשמח אם תבחרו בשלי – Tuli's Nails J

מה שצריך לעשות זה בסה"כ להקליק על הקישור הזה לאתר של רשת בלוגריות הלקים, לסמן את העיגול שליד השם שאתן רוצות לבחור וללחוץ Vote ( שלי שלי....) :


The Polish Bloggers Network Website.


אז קדימה, לכו להצביע ולהשפיע !


The Polish Bloggers Network is hosting the "Nail Off" nail art contest, sponsored by the wonderful China Glaze and Seche Vite !!!


Each participant had to create a special manicure for the contest, this time without a specific topic, but the rule was you must use China Glaze and Seche Vite polishes only.

When I first read about this contest, I was really thrilled by the fact that these two major brands has agreed to take part in our wonderful network activity and offer such an amazing prizes, and for 2 (!!) winners ! You can find all the details about the contest and the prizes in the network website - You are also welcome to join and follow our wonderful network website and get updates about all the hot news in the nail polish world -http://nailblognetwork.onsugar.com/

I love China Glazes polishes and I have many of their polishes and I love Seche Vite and I have many of their treatments, but I (still) don't have any of their colorful polishes.

It was so hard to choose the polishes for this mani, but eventually I decided to go with Stella, which is one of my favorites polishes ever !!!

This polish is so stunning, so "deep" and so…sexy….that I decided to go with my basic instinct about it and try to create a "sexy" manicure, and what is sexier than a corset ?

Well, there are many more things….but this is the only thing I knew how to paint freehand…lol


So I've decided on corsets and rhinestones and…..the result is in front of you ! In the spirit of this manicure, I named it "Sexy Stella" and I hope you'll like it J


To create the corset's stripes, I used China Glaze How About A Tumble and rhinestones to the sides of the corset.

To create the glitter polish, I used Stella as a base (2 coats) and added above the gorgeous Carnival Lights, from my favorite China Glaze Glitter series.

Also, I used Seche Ridge Filler as a base coat and Seche Vite Dry Fast Topcoat.


There are many more lovely bloggers participating in this contest and everyone made a fabulous mani, so I know you're going to have a hard time to choose, but I would be happy if you'll choose mine - Tuli's Nails J

All you have to do is just click this link to the Polish Bloggers Network website and choose the mani you loved the most (mine, mine…) :


The Polish Bloggers Network Website.

So go ahead and vote !


twitter / Tulisnailpolish

Discounts